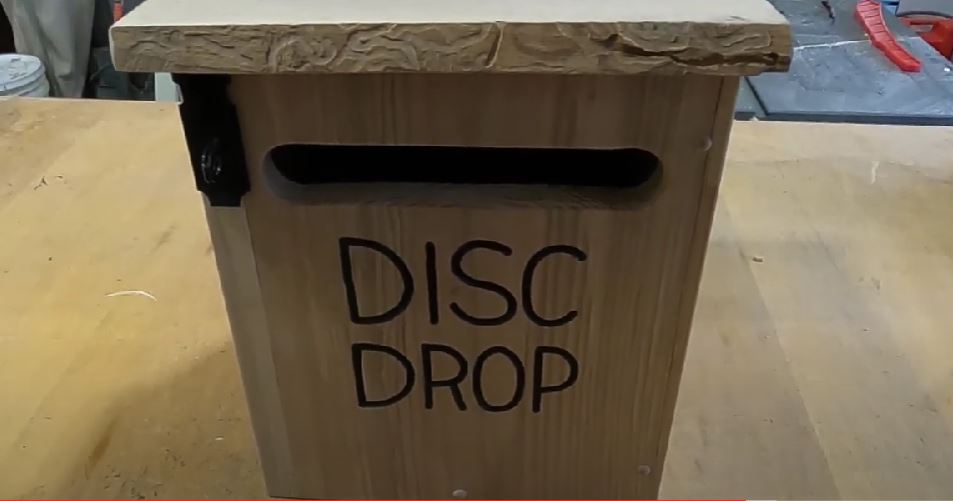
We left off in the last video just about ready to router the letters onto the face of the drop box. As I mentioned in the previous video, the board that I milled and planed was just enough to build the drop box. If I made a mistake with the lettering and ruined the front piece then there was no do overs. I took my time and methodically routered the lettering with no issues. Everything went smoothly and turned out perfect.
The next thing to do is to paint the letters so they stand out against the wood grain. Taking some exterior grade black paint I used a small artists brush and filled the lettering with paint. I wasn't too careful in this process as after assembly I will remove any over painting. The main concern was to just get the letters filled fully.
After a day of drying time it was time to assemble the whole project. I pilot holed the pieces on the drill press earlier and now it is time to fit the pieces together. Once placed together and clamped I used a drill bit the same size as the screw shank and drilled the other pieces to allow for easy fitment of the screws. Hardwood has a tendency to split and not hold well if not pre drilled. This made for assembling the pieces much easier. Before fully screwing the sides together I also used a liberal amount of wood glue to make sure it holds together for life.
So now it's time to focus our attention back to the lettering. Using 220 grit sandpaper I lightly sanded the edges around all the letters taking off any over paint. Then it was time to sand the entire box starting at 100 grit and finishing it off with 220. There was no need to go any smoother as the box is going to be an outside fixture anyway.
So now we have the whole box put together and we need to install the top door. We measure out the hinge location and pre drill the screw holes here also. Using the screws supplied with the hinges I put everything together and tested the functionality. Moving on to the bottom, I took the bottom piece and cut off each corner before installing it. This leaves a gap in each corner for water etc. to fall out and not prematurely rot the bottom. This box will be outside all year long so I wanted to make sure rain, snow, dirt etc. doesn't accumulate in the bottom of the box.
Originally I was going to plug all the screw holes with flush plugs and then sand them all flat so the screws all but disappeared but after test fitting rounded plugs I decided to use these instead as I think it makes for a better look. I glued the plugs in place and we moved onto finishing the box.
There are a lot of options when it comes to the final finish. You can stain and then seal with a poly urethane but I chose to do something a bit different. I chose to use tongue oil. Tongue oil is very similar to boiled linseed oil or teak oil. I find it gives a rich natural colour and penetrates into the wood for a lasting protection. In order to have a long lasting finish though you need to apply several coats. I chose to do three on the outside of the box and just one on the inside. You can apply this oil with a sponge or clean lint free cloth. Just pour it on and wipe it around until it soaks in.
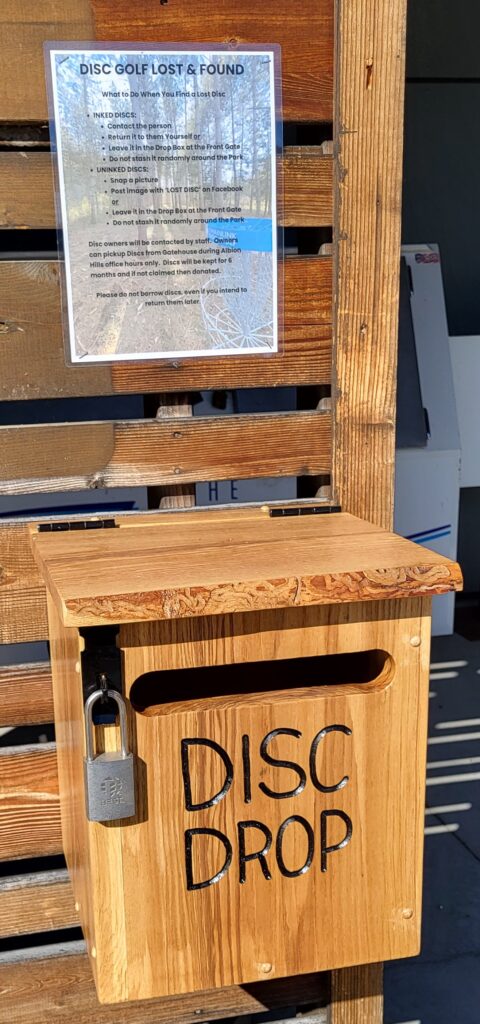
A few days later and the box is ready for installation. I mounted it at the entrance to the facility where all parties pass by it. I have checked back in with the facility since then and the feedback has been great. Turns out the public is using it for all sorts of lost items and not just discs which is a great service. So happy to hear things are working out as intended.