
My wife and I decided that when we got married we would have an outdoor wedding. The venue held approximately 150 people for the reception but this meant I had to figure out how I was going to sit that many people for the ceremony. We decided on rustic log benches that I would build at home prior and then assemble them at the venue. A simple yet effective design that wouldn't take too long to make but made for easy transport.
Now that we had the idea it was time to come up with a plan on how to do this. The first thing we would need is a simple design. I settled on 2 inch thick live edge tops, roughly 12 inches wide with three simple legs. The overall bench would be 12 feet long so this seemed like the right number of legs to support the whole bench. They would be easy to transport and assemble, however I needed 20 of them in total.
Now that we had everything figured out I would need some tools. Luckily I had the exact tool already as I purchased it years earlier to build my off grid cabin. This tool of course is the Granberg Alaskan Chainsaw Mill. Attach it to your chainsaw, add a ripping chain and you are totally portable to go and start milling logs into lumber.

Click the links here to get all the tools needed to mill and build for yourself. As an Amazon associate, I earn from qualified purchases.
Granberg Mill https://amzn.to/3OU5pYQ
Chainsaw Mill Rails https://amzn.to/437iAeZ
Drawknife https://amzn.to/42OaAPN
Log Tongs https://amzn.to/3wpFOjT
So now we have the idea and the chainsaw mill, all we need is the tree to convert into lumber. I ended up walking back into our bush behind our house and selected a massive spruce tree that had died. It needed to come out anyway and would supply me with large enough logs that I could easily get 20, 2 inch thick boards out of it. First I had to fell the tree which due to it's shear size it would not come down cleanly so some ingenuity came into play and I hand winched the base out till it finally dropped. Now that it's on the ground I limbed it and cut it up into 12 foot lengths. I then used a set of log tongs to lift it up onto stumps so it was at a manageable working height.
If you have never used a chainsaw mill the theory is you run the first cut along a straight edge. You can use pre made rails for this, 2x4s on edge, or a flat, wide board but my favorite tool for this is an old aluminum ladder. Perfectly straight and light to carry around. Once the first cut is done then remove the ladder and the mill slides along the flat surface you just created. Set whatever thickness you want and start slicing.
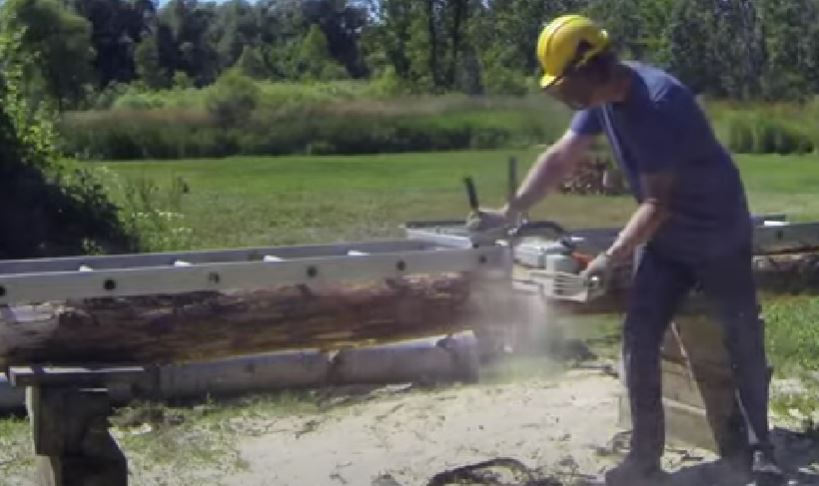
I set everything up and started to slice boards. One by one I created 2 inch thick bench tops and carried them out of the bush by hand. Where I was cutting I did not have the ability to get equipment into the tree so this was another great reason for the portable chainsaw mill. If you cant bring the log to the mill then you take the mill to the log. Cutting these boards took me the better part of day as spruce is pretty soft and cuts relatively easy.
Check out my video here on milling the logs into lumber. Head on over to my Youtube page to see all the videos on how I dropped the tree then milled it and turned it into benches.
The next step now that all the rough material was cut and brought up to the shop is to remove the bark and create the legs. I began removing the bark with a drawknife then giving them a light sanding. I wanted to make sure people weren't going to catch their clothes etc. The legs were created by taking one of the boards and cutting it to 15 inch long pieces. This gave me enough legs for all the benches and they would be set at just about chair height. The legs were attached by using simple screws from the top down. As mentioned earlier they had to be transported in pieces and assembled at the venue so I didn't want an elaborate design. It had to be simple and this worked super well. If building them for a more substantial time period I would add bracing but for a short ceremony they worked just fine.
It took a while to make all these benches from scratch but they were certainly worth it in the end. Actually the venue owner was so pleased with them that the ended up buying them from me so he could use them as numerous people I'm sure want the same thing. Saved me unscrewing al of them and bringing them home. I hope lots of weddings have enjoyed them since ours. I may have to make more for our firepit!
Steps taken to Create Rustic Benches
1. Cut down a suitable tree
2. Install chainsaw mill and slice tree into lumber
3. clean edges and cut legs
4. install legs and you are done